Fly-Fishing Photography
By Frank Wood
Cameras If publishing is a consideration – the DSLR is really the only way to go. This class of camera offers the most flexibility and the capabilities needed to meet your photographic requirements. As in the case of the point and shoot series of cameras, there are many DSLR types available. These range from the entry level Consumer series up in price and capabilities to the Pro series. There are advantages and disadvantages to each type that go beyond the scope of this article, but suffice it to say that you do not have to feel forced into making a hasty decision. A quick Google of ‘DSLR Reviews’, will return results that will provide more than enough information to aid you in this matter. My main recommendation is to buy what you can afford, and than take the time to learn its capabilities. Subject Matter
Fish There are several things you can do to improve your shots without placing undue stress on the fish while you take them. First off, have someone else take the picture. It is extremely difficult to hold the fish (without injuring it), while also taking the picture. With this in mind, after you’ve landed the fish keep it in the net and in the water until the photographer is ready to make the shot. When you get the word, lift the fish out of the net and allow the photographer to take a few shots. While the photographer is previewing his pictures, return the fish to the net. If necessary, repeat the process.
If you are the photographer taking the picture, there are a few things you need to do to prepare for the shot. First set up your tripod. Check to make sure that your auto focus is on, and that any custom settings from previous shots have been turned off. If at all possible, get the angler into a kneeling position in front of you. Have them take off their sunglasses, and tip up their hat ever so slightly. When you say ready, have the angler lift the fish and point its head slightly towards you. Fill the frame with the shot and take several pictures. Have the angler return the fish to the net and check your histogram. If shadows show up, repeat the shots only this time use fill flash. Wildlife photography is all about composition, and portraying them in their natural habitat. One thing to remember is to always respect the animal and its space. If the animal is moving away from you, don’t chase it down for the shot. If it is stomping its feet, or showing other threatening signs – back off. With a little patience and some luck, you will be able to add this type of picture to your repertoire. People
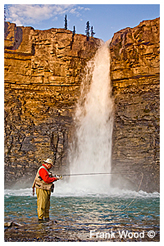
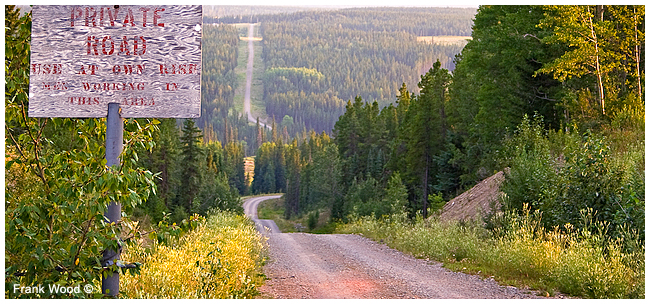
Action shots of people are some of the best, but they require that the photographer be prepared. Prior to taking the shot, the photographer should explore the various vantage points, check exposure and composition, pre focus, set the drive mode to continuous, and be ready when the action starts. Often timing is critical, and by doing all the preliminary work beforehand – you increase your chances of getting ‘the shot’. Landscapes Landscape photography is all about composition. If you examine the work of the masters, you will see three common elements in their pictures: 1. a foreground. 2. A middle ground. 3. A background. When combined, these three elements balance the shot, and make it truly compelling. Also don’t forget to add an angler into the picture. This not only provides a sense of scale to the picture, it also tells a story of why you were there in the first place. When taking pictures with waterfalls in the background, an old trick for getting that silky smooth look to the water is to set the shutter speed for 1 to 2 seconds. In the resulting picture, the water will show movement, but everything else will look frozen in time.
|


 knowledge, skill, time, and commitment. That said you don’t need to abandon your fly rod and spend your time in a blind to get more and better wildlife pictures. I am only suggesting that you be ready with your camera when the opportunity presents itself.