We live in extraordinary times - it is now possible to shoot video with a digital single lens reflex (DSLR) camera that rivals professional video cameras. News, sports and nature photographers are beginning to shoot video at the same time they are shooting still images. Video can also be used to shoot weddings, special events, and real estate. The edited movie clips can be posted on a web site, burned to a DVD, or uploaded to video sharing sites like YouTube. YouTube is now the second largest search engine after Google and the demand for video online for entertainment, education and promotional purposes is growing rapidly.
Photograph taken with Canon 5D Mark II, 300 mm F4 lens + 1.4X tele-converter on a tripod.
Video of Great Horned Owl - 35 seconds with Canon 5D Mark II camera and 300 mm F4 lens + 1.4X Teleconverter.
Video and digital still photography have many things in common including the use of filters, composition, white balance and the need for a tripod to create professional quality imagery. However, there are also some differences in how to approach shooting video in comparison to still photography. Shooting video requires more planning and post production is essential. When shooting video you also have to pay attention to sound recording. Video takes more time then editing single pictures and there is also more to learn about. Still photography only requires a single person, but shooting professional quality video often requires the colloborative efforts of a small team. With that in mind I provide a few suggestions for anyone wanting to make videos with their DSLR camera.
Before I had the ability to shoot video with my SLR camera I would set up two sometimes three tripods. This setup in the Bella Coola Valley near a Grizzly Bear Fishing Hole. It's impossible to control more then one camera at a time and follow any action.
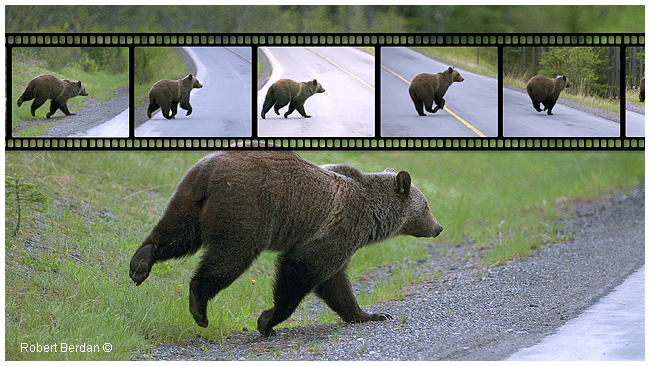
Grizzly bear walking downstream along the Atnarko River at sunrise in the Bella Coola Valley , BC.
Movie here of Great Bear Rainforest.
Bears on the West Coast - Bella Coola and The Great Bear Rainforest. (3 minutes) - the latter part of the video was
taken hand-held in a Zodiac boat - hence the bouncy movement.
Start by becoming familiar with the video controls on your DSLR camera by reading your manual. Most DSLR cameras require you to focus manually and since the depth of field can be shallow focusing is critical. Also your camera may offer different video sizes and frame rates. True high definition (HD) video is 1920 x 1080p pixels which is good enough for major TV stations. Some cameras have lower 720p resolution which is good enough for the web. You also may have different frame rates to choose from including 24 or 30 frames per second (fps). TV uses 30 fps and most movies are shot at the slower 24 fps. Faster frame rates are better for recording pictures with lots of action. The best way to learn about the video capabilities of your camera is to play with it in your backyard or home and then when you are ready to make a short movie start by doing some planning. Planning is essential, most movie makers create a storyboard which consists of drawings that outine the different scenes and show how the movie will flow from one scene to the next. In nature and documentary movies it is difficult to control what will happen, but planning is still essential if you want to tell a short story.
With a DSLR camera it's possible to shoot video and take pictures with one camera. Digital cameras are also less sensitive to moisture compared to tape driven cameras which fail when the humidity is high or in wet raining conditions as I found out shooting in the Great Bear Rainforest. Also the video is already digitized you simply copy the movie files to your computer and play them or import them into your video editing software.
Below are some tips to help anyone make better videos:
1) When possible use a tripod or a monopod it will help you keep your images steady. If you must handhold the camera make sure it doesn't bounce up and down and move the camera smoothly.
2) Avoid too much zooming in and out it is the sure sign of an amateur film maker. When zooming or panning do it slowly, you can always speed it up in post production and the quality of the picture will be better. Pro videographers often use fluid head tripods which cost a fortune, but you can add elastic bands to the video arm and pull on them instead of the arm - this simple technique helps pans look smoother. A regular camera tripod can be used for shooting video stills, but if you plan to pan and follow the action you will want to purchase a proper video head for your tripod.
3) Follow the action and like photography use the rule of thirds to position your main subjects in the frame. In some instances it helps to move the camera by attaching it to your car, bike, kayak or even a helmet if you want to capture movement.
4) Pay attention to sound, most DSLRs offer poor sound recording quality. Consider adding a small shot gun microphone on top of the DSLR camera or use a separate digital sound recorder. Wireless microphones are great for recording voice, but are expensive. Noise created by the wind on the camera's microphone is a common problem. The wind noise can be removed in post production and replaced with sound recorded using a separate digital recorder. Alternatively it is possible to attach a Beachtek two channel balanced XLR adapter to the camera for better sound recording for a cost of about $180. The XLR adapter permits that attachment of professional quality microphones and volume control.
5) Watch TV and movies and study how the camera operators frame each scene and move from one scene to another. Watching movies is the cheapest film school you can attend.
6) Learn how to edit your video. There is a wide selection of video editing software for beginners to professionals - see links below. Editing is an important skill to learn if you plan to make your own movies.
7) Try to shoot your video under even lighting and avoid backlit situations. If necessary add a video light or use a portable reflector when shooting in bright sunlight or backlit situations.
8) Consider making time-lapse movies. Some cameras have intervalmeters built in (Nikon) and others like Canon offer separate units you can purchase for about $175 (e.g. TC80N3) to control the time between photographs. You might record one shot every 10 seconds then import the images into your video editing software and speed it up.
9) Before shooting video always check that the front of your lens and filters are free of dirt and water drops. It is harder to remove spots in video post production then it is with still digital images.
10) Set the white balance to the type of light you are shooting in, its better to get it right in the camera then try to fix problems later.
11) When choosing music for your video beware that if you plan to post your video on the web you must use royalty free music or have permission if you want to avoid a potential lawsuit. There are several web sites that sell royalty free music for video and multimedia productions (e.g. www.jamendo.com and www.cssmusic.com ).
12) Use large fast storage cards and each time you make a recording shoot at least 15 seconds of video as this makes it easier to edit. When panning record about 4 seconds before you start to pan and then record an additional 4 seconds when you finnish panning.
13) Finally, don't shoot video in the vertical mode unless you want to flip your HD TV on its side, it doesn't work very well.
Rule of thirds works for both photography and video - try to position the subject roughly in the third of the frame rather then the center. Also try to have the subject looking into the frame instead of outside.
The reason for the interest in shooting video with DSLR cameras is that they cost a fraction of the price of a professional video camera and there are lots lens choices. DSLR video cameras also offer a shallow depth of field which can be used to isolate the subject form the background and the cameras are smaller then most Pro video cameras which makes them suitable for travel, nature and adventure photography.With the technology available today anyone can become a movie maker and as with any art form the more your practice the better you will become. Steven Speilberg made his first film when he was only 12 years old and a music video uploaded to YouTube helped propel Justin Bieber's career. If you have a web site and attach video, when visitors download them it takes up a great deal of bandwidth which you have to pay for if you exceed your montly limit. To get around this put your video on Youtube and then link to it. This will save you hosting costs and also if others like your video they can share and help promote your movies. See sample videos on Youtube by the Canadian Nature Photographer.
Robert Berdan editing video using a PC and Adobe Premiere Pro. A fast computer equipped with a large monitor or two monitors and good quality speakers are important when video editing. Adobe Premiere Pro and Apple's Final Cut Pro are considered mid level quality video editing programs.
In 2009, I enrolled in the Banff Adventure film workshop where I met folks that filmed for National Geographic, PBS and the BBC. I also met a number of up and coming video makers from around the world and learned that most struggle to raise money to make their movies. Furthermore the most important thing in making a video is that you need to have a story to tell. For anyone interested in learning more about movie-making I recommend the Adventure film workshop at the Banff Centre, it's a good place to kick start your movie making career and if your camera has HD video - give it a try. RB
J. Ball, C. Carman, M. Gottshalk and R. Harrington (2010) From Still to Motion: A photographer's guide to creating video with your DSLR - Paperback ISBN-13: 978-0321702111 $60.00 CDN Available at Amazon
S. Ascher and E. PIncus (2008) The Filmmaker's Handbook: A Comprehensive Guide for the Digital Age [Paperback]ISBN-13: 978-0452286788 . Available at Amazon.
W. Murch (2001) In the Blink of an Eye. 2nd edition. Silman-James Press, ISBN 1-979505-62-2.
S. Stockman (2011) Shoot Video that Doesn't Suck. Workman Publishing. ISBN 9-780761 163237.