
Hummingbird Photography Tips
by Ken Crebbin
March 2, 2015
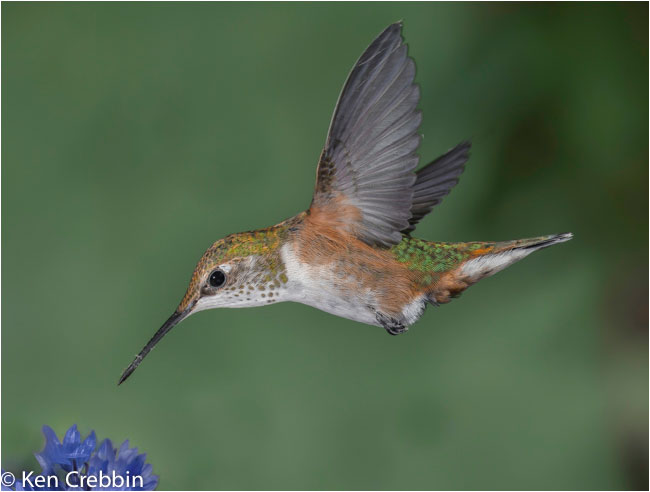
Rufous hummingbird
Three years ago I started trying to capture images of hummingbirds. I would grab my camera and hike around looking for hummingbirds … but I found this gave me limited success and I wanted to produce better images. Not satisfied with my images, my next step was searching the Internet trying to gather information on hummingbird photography. I found that the best images were taken using hummingbird feeders. It is a lot more productive to set out a feeder and simply let the hummingbirds come to you. I finally meet a fellow photographer who had spent years taking wonderful images of hummingbirds, and he helped me understand the basics. His advice saved me a lot of time and essentially sent me in the right direction to capture images of hummingbirds in flight. I have been very grateful for his sharing his knowledge.
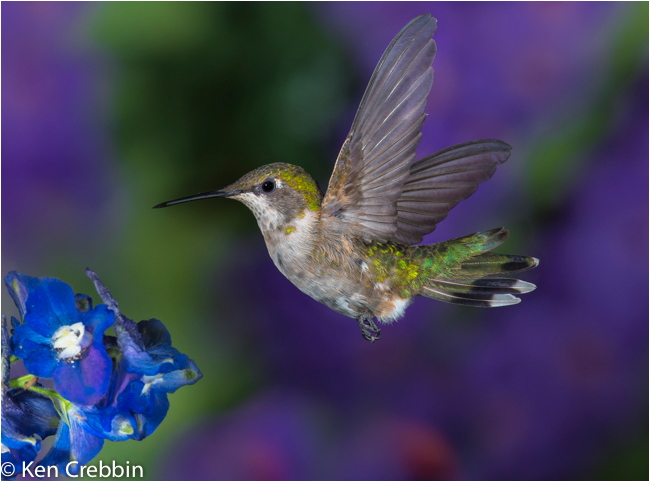
Ruby-throated hummingbird
There are just a few simple steps you should take before you start photographing hummingbirds.There are dozens of feeders available on the market. Some features to look for are feeders that are easy to clean and don’t block the hummingbirds when photographing. Keep the feeder clean by washing and replace the nectar every few days (more often if it is in direct sunlight). The nectar can spoil quickly and if it does, the hummingbirds will know and they will avoid your feeder. Food for your feeder is a water and sugar solution (4 parts water:1 part sugar). That’s 20 percent sugar and what most nectar-bearing flowers contain. I have also read that hummingbirds prefer cane sugar over beet sugar.
Ruby-throated hummingbird
Not all feeders are equal. I have read reviews on many feeders and have tried some of them. Some of them successfully attracted hummingbirds, while others did not. The hummingbirds seem to have their own preferences when it comes to feeders. I have about 14 different feeders I hang in different areas of my yard to see which ones they prefer. Finding out what feeders hummingbirds in your area prefer seems to be by trial and error. Be patient; it took me three summers to find what works and I am still experimenting with different types of feeders and setups. Maybe some of your neighbours would be interested in helping out by hanging up feeders in their yards!
Anna's hummingbird is a medium-sized stocky hummingbird native to the west coast of North America. This bird was named after Anna Masséna, Duchess of Rivoli (Wikipedia)
If you like to garden, you can plant specific flowers to attract hummingbirds to your yard. The first hummingbird we saw at our house was on red tiger lilies in our flower garden. There are a variety of flowers that hummingbirds like, a lot that are perennials that are easy to grow. Some varieties are: Bee Balm, Coral Bells, Bleeding Hearts, Delphinium, Honeysuckle and Monk’s Hood. If you plant some of these flowers and hang feeders in your yard this increases your chance to attract migrating hummingbirds as they may stop to feed and explore the surrounding area searching for a good food supply and nesting sites. Hummingbirds have good long term memories and if they find your yard appealing they may return the following year.
Ruby-throated humminbird
Getting started photographing hummingbirds
Equipment needed
Camera: My camera is a Nikon D800, but any DSL camera will work as long as it has a "hot shoe" or a pop-up flash that can serve as a commander.
Lens: Ideally, you want a lens that is fast, sharp and can focus close to the camera. My best shots have been taken with a 300mm Nikon lens…which is fast (f2.8) and insanely sharp.
Tripod: Mounting your camera on a tripod will increase your percentage of tack sharp photos.
Backdrop: You will want a backdrop behind your feeder to avoid the black night-time look. I used a piece of posterboard that I painted with patterns for an attractive bokeh.
Flash and Set-ups
Flash duration is quicker than shutter speed. Not only does high-speed flash allow us to freeze wing motion, but it also allows to highlight hummingbird iridescence. Put your set-up in a shady area; I do all my set-ups in the evening when the hummingbirds are most active. I recommend to start with the basics and you won’t get overwhelmed. For basic multiple-flash hummingbird photography you need, in my opinion, a minimum of five flashes. You’ll want three flashes aimed at the bird to eliminate shadows on the bird and two at the background to eliminate a "halo" effect. There are many books written on multiple-flash set-ups and I recommend further reading as this would take many pages for this article and more experienced authors will explain in more detail.
This is from the Nikon site and defines the output duration of the flashes:
1/840 sec. @ 1/1 (full) output
1/1100 sec. @ 1/2 output
1/2300 sec. @ 1/4 output
1/4880 sec. @ 1/8 output
1/9100 sec. @ 1/16 output
1/19000 sec. @ 1/32 output
1/28800 sec. @ 1/64 output
Ruby-throated hummingbird
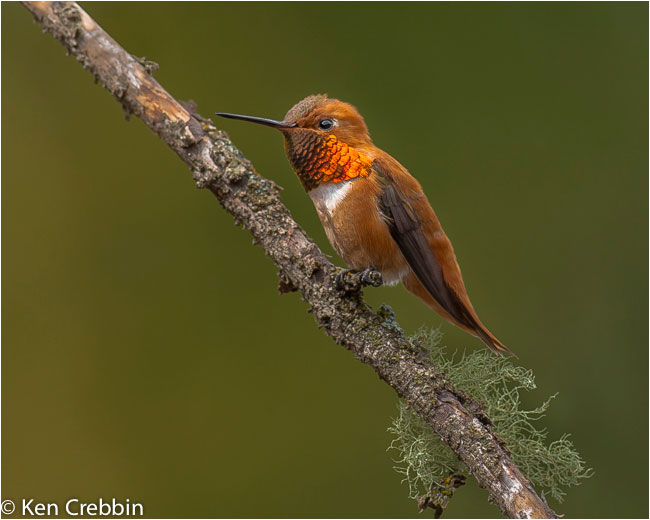
Rufous hummingbird
Since hummingbirds can beat their wings up to 200 times per second start with 1/32 output 1/19000 sec for your flashes. You might run into something called “ghosting” when using multiple-flash set-ups. Ghosting can get complicated; this happened to me and was a challenge to solve, but worth it in the end. I had to do more research to figure this out.
Rufous hummingbird
I use the auto-focus, AF, setting on my camera. This allows the camera to refocus on the hummingbird as it is darting around. It is harder than it sounds, as they are very fast. My ISO is 100 up to 400, shutter speed 1/250, aperture f/10 or f/13. Take lots of test shots when setting up your flashes. I also use a light meter to measure my flash output and adjust my flashes by moving them closer or farther away from the subject as needed.
Ruby-throated hummingbird
When setting up your camera and tripod, figure out the angle and direction where you want the hummingbird to fly. Next, take some tape and block off all the feeding holes except the one you want the birds to use. This it puts the bird where you want it and it causes other birds to wait nearby for the feeder, which puts them in a perfect spot to capture them without the distraction of the feeder. One last thing, if you have multiple hummingbird feeders like myself, take down all of them except the one you are actually using for your photography. This will give your hummingbirds no choice but to go to your setup. Remember when you're finished to put the other feeders back and pull off the tape so your feeders get as many birds using it as possible.
Rubby-throated hummingbird
Tips that work for me
Attach a flower over the hole you left open on the feeder and then put a bit of nectar into the flower with an eyedropper. Since the hummingbirds will become conditioned to come to that particular feeding hole, the next time they come back, they go to the flower.
Rufous hummingbird
I like to include some flowers in my shots. Use local flowers; mine are from my wife's garden. For those concerned about the flashes bothering the hummingbirds, my experience is that some birds react at first but soon become accustomed to the routine. Take your time, be patient, and the hummingbirds will soon get used to the whole setup.
Ruby-throated Hummingbird
Rufous hummingbird
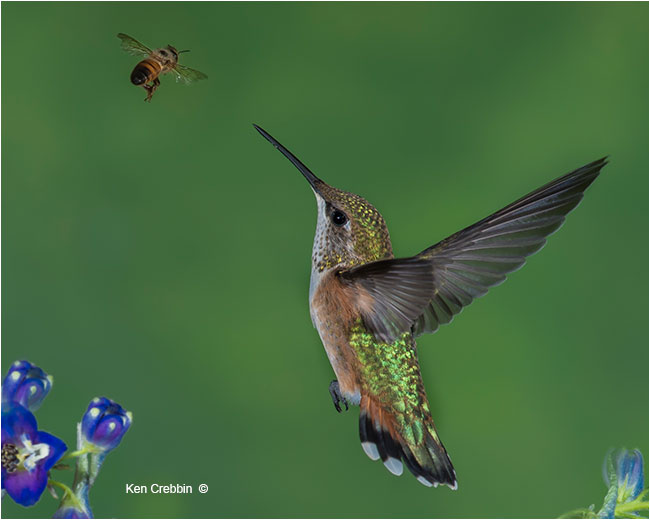
"Things with Wings - won first pace in Canadian Geographic Photo Contest"
With a bit of practice and patience you will soon be taking great photos worth showing your friends. Remember that to get a few goods images you will take hundreds of shots. What better way to spend a warm summer evening: nice chair, cold drink, lots of hummingbirds, and my wife's beautiful flower garden. I hope this is enough to inspire you to give hummingbird photography a try this summer.


|
Bio: Ken Crebbin is an amateur photographer living south of Calgary. Ken uses Nikon equipment as described above and enjoys nature photography. I have always had an interest in nature, especially birds. Growing up in Calgary our family spent a lot of time camping and hiking in the foothills and mountains west of Calgary. In the 1980’s my wife and I moved to De Winton (just south of Calgary). With the Bow River at my doorstep I have had the opportunity to fish, hike and horseback ride through the river valley. I have also had an interest in photography since I was a youth. Recently I made the jump from film photography to digital and found combining my interest with birds and learning my new digital camera a worthwhile challenge
E-mail: kencrebbin@hotmail.com |

Links to Previous Articles by Ken Crebbin on the Canadfian Nature Photographer
1. Wintering Bald Eagles on the Bow River
2. Backyard Birds by Ken Crebbin
[ Top ]