
An Overview of the Best Tripods and Heads for Nature Photographers
By Dr. Robert Berdan
January 13, 2012
Pro wildlife photographer Peter A. Dettling sets up his tripod in front of Spirit Island, Jasper National Park before sunrise - a portable lightweight tripod was essential in this situation (visit Peter Dettlings web site to view his photographs).
Choosing a tripod and tripod head is a bit like choosing a spouse - you need to take your time, do your research and if possible try them out before you commit to one. If you are an avid nature photographer sooner or later you will want to own a tripod. I believe that any tripod is better then no tripod because even a cheap tripod will permit you to shoot certain subjects that are impossible without one. However, I also recommend you buy the best tripod you can afford. If you buy a good one it could last you 20 years or more and will be more enjoyable to use. How much you need to spend depends on how much gear you own, how heavy a lens you need to support, how much weight you are willing to carry.
A tripod can improve the quality of your pictures and allow you to photograph subjects closeup or under low light conditions which are not possible by hand holding your camera. Tripods are also routinely used to shoot video which many of the newer Digital Single Lens Reflex (DSLR) cameras are capable of. Below I describe various tripod features, monopods, and tripod heads that will help you choose the best tripod for your needs and budget.
Basic Tripod for Nature photographers. Shown above is a carbon fiber tripod that stands over five feet in height, it is light weight and can support a 300 mm F4 telephoto lens. The tripod legs can go completely flat to allow for macrophotography ( I cut off the bottom part of the center post with a hacksaw) and the center post has a small hook to hang additional weight at the bottom for greater stability. In practice I rarely use this hook. Foam rubber grips and a bubble level are nice additional features. The ballhead with quick release plate allows the camera to be attached and positioned quickly. This Milano carbon fiber tripod is sold only at London Drugs with models costing between $300 -$400 and it includes the ballhead and carrying bag. Similar carbon fiber tripods are available from a wide variety of manufacturers - see links below. If you need to support a heavier lens (e.g. 300 mm F2.8 or larger) I would consider purchasing a slightly larger tripod and ball head. If you opt for aluminium legs you can shave off a hundred dollars or more and still get an excellent pro quality tripod. This tripod has the important features I would recommend to someone looking to buy their first tripod for nature photography.
The good news about tripods is that today there are more models to choose from then ever before and many are lighter, sturdier and better designed than previous tripods. Carbon fiber has significantly reduced the weight of tripods though not their cost. Because of the Internet if there is a problem with a tripod or tripod head it doesn't take long for others to know about it through forums and online-reviews and the manufacturers had better be listening. Unfortunately, most photo-magazine reviews are of little value as they rarely point out equipment weaknesses lest they lose revenue from a potential advertiser. Photography books by various nature photographers (e.g. Tim Fitzharris, Arthur Morris, John Shaw) , however do provide honest critical opinions of their equipment and offer good advice. I curently own 9 tripods and I have owned more then 20 over the past 40 years from the el-cheapo models to the most expensive. Some of the most expensive tripods and heads (e.g. early Gitzo Carbon fiber tripodsand Arca Swiss B-1 Ballheads) had serious issues which I will reveal. I own several tripods because for me no single tripod is perfect for all situations, but you really only need one good one.
Are tripods essential today?
I currently use a tripod about 50% of the time. The reason I don't have to use a tripod more often when using my telephoto lenses is because of image stabilization also called VR or vibration reduction technology. This technology allows most users to shoot at 1-3 shutter speeds slower then they might otherwise be able and still get sharp photos. The technology really works - if you have doubts take some pictures with it turned off! The general rule of thumb is that most photographers can hand hold their camera provided the shutter speed is 1\focal length or faster. In other words, if you use a 300 mm lens you need to use at least 1\300 of a second for sharp results. VR technology can allow you to shoot with a slightly slower shutter speed. The other major advance in digital technology is the ability to shoot at high ISO speeds like 1600 which allows us to use faster shutter speeds then ever before. High ISO speed is usually associated with higher amounts of digital noise in the picture, but improved in-camera noise reduction and the ability to reduce noise using software (e.g. Adobe Photoshop) permits photographers to use high ISO speeds more often. Using higher ISO speeds allows us to shoot at faster shutter speeds resulting in sharper pictures. While these technologies have helped photographers use a tripod less often, a tripod is still essential in really low light and many other circumstances.
Pro Wildlife photographer Hälle Flygare demonstrates how to hand hold a 70-200 mm F2.8 lens that uses vibration reduction technology (visit Halle's web site Nature In Wild Places to see some his wildlife photos).
Most people find tripods to be restrictive and frankly tripods are a nuisance to carry around. With fleeting wildlife I often tru to photograph an animal first by hand holding my camera and lens and then use a tripod if the animal sticks around. In most instances my photographs taken with a tripod are sharper and more carefully composed.
The image of a Great Horned Owl above was taken close to my home in Silver Springs, Calgary. When I first saw the owl I ran over to it carrying my camera and 300 mm F2.8 lens and fired off a round of photos hand held. After 10 minutes I went back to my car and brought back my tripod with me. I photographed the owl for another 15 minutes and these images were superior in composition and sharpness. Having my lens attached to the tripod allowed me to compose more carefully and eliminate distracting branches around the side of the frame. It's hard to pay attention to the edges of the viewfinder frame when trying to hold a big lens steady by hand. A tripod will similarly help anyone compose more carefully - especially landscapes and macrophotographs.
Blue moose photographed with Nikon D300 camer hand held about one hour before sunrisea, 70-200 mm F2.8 lens with VR and ISO 400, exposure time 2.5 seconds. By increasing the camera ISO speed to 3200 and using a tripod and shutter speed of 1\160 of a second I was able to get a sharp, but grainy image of one of the moose (below).
Blue moose taken with Nikon D300, ISO 3200, 70-200 mm F2.8 zoom lens mounted on a tripod, 1\160 sec.
In nature one of my favorite subjects is capturing moving water and water falls. By selecting shutter speeds below 1\8 of second the water moves during the exposure and creates a silky appearance due to its motion during the exposure. In order to capture these type of pictures a tripod is essential.
Sutherland Creek Waterfalls in Revelstoke, BC - 1 second exposure, camera and lens mounted on a tripod.
Aurora Borealis photographed at High Level, AB - the exposure was 8 seconds and this photo could only be taken using a tripod. Canon 5D mark II, 24 mm F1.4 lens, ISO 1600.
Instances where a tripod is essential include:
- Low light, night sky, star trails and Aurora photography
- Using heavy camera gear, medium and large format cameras for landscapes
- Using large heavy telephoto lenses (e.g. 300mm F2.8 or larger lenses)
- Close-up photography with a macro lens without a flash
- Taking self portraits using a self timer
- For HDR imaging where you need to combine and overlay several images in register
- For focus stacking where you combine images that vary in focus
- For creating water motion blur effects
- For time lapse photography
- For creating landscapes having maximum depth of field and using apertures of F11 to F64
- For shooting HD video without constant up and down jerky movements
- For anyone that might have trouble holding their camera steady
What to look for when buying a tripod for nature photography
The requirements of a good tripod for nature photography are more stringent than buying a tripod for use in a studio. The tripod must be light in weight to be carried into the field, it must withstand a wide variety of environmental conditions and for macrophotography must be able to be positioned close to the ground. The tripod should also be quick to set up, easy to use and not alert your presence to wildlife (i.e. legs should be black, green or camo). The legs should be able to extend flat on the ground and each leg should be able to move independent of the other legs for work on uneven terrain. An important part of your tripod is the head used to attach and maneuver the camera (discussed later). Also the legs should attach to the tripod using a strong simple connector with reinforcement posts for greater stability (e.g. Gitzo) no springs or gears. The leg locks should be quick to set up (twist type or clips) and should be usable when the tripod legs are immersed in water. The tripod should ideally come to your chin in height so it's comfortable to work with standing up. The legs should be lightweight, rigid but strong so they don't break if the tripod falls over or someone steps on it.
Buying a tripod for nature photography involves two choices - one is to select the right tripod and the other is to select the right type of head though there is no reason you can't own several heads and use them on the same tripod.
In this photo I am in the middle of a river taking a panorama using a Velbon Sherpa Pro tripod and QuickPan Spherical tripod head from Kaidan. Some tripod legs (older Gitzo carbon fiber models) locked up when wet because they used leather bushings in their construction. If you purchase a tripod with twist locks and you plan to use it in water make sure it does not use leather bushings - newer Gitzo tripods now use plastic bushings. Photo by Karl Berdan.
Gardner Creek and waterfall, BC photographed from the middle of the stream using a 4 x 5 camera and tripod. Exposure 4 secs at F45 on Fuji Velvia ISO 50 film. A small dipper is sitting on the center boulder. I often shoot from the center of a creek or stream so a tripod and ballhead that functions when wet is essential to me.
Tripod feet
Many tripods have plastic tips on the end of their legs. Better feet have rubber that twists to reveal spikes. If your tripod has plastic you can purchase rubber feet at most hardware stores and some tripod manufacturers sell a variety of different tripod feet (e.g. Manfrotto). Spiked feet are useful in dirt, on ice and under windy conditions. If you shoot in the snow the tripod legs can sink. Some manufacturers offer flat feet you can add to the bottom of the legs and some photographers use plastic plates or frisbees to support the tripod legs in deep snow. In deep snow I simply pack the snow down with my feet or let the legs sink in.
Flat feet on this Vanguard - Auctus carbon fiber tripod (available at Amazon.com) - also see review of these unusual feet which are intended to reduce sinking into the ground and snow. I think big feet lke this would just get in my way or get caught on things when I carried the tripod.
Materials used to build the tripod are important
Tripods are made of: wood, plastic, carbon fiber, aluminium and steel. The bulk of most tripods are the legs and the materials used for the legs are: wood, steel, aluminium and carbon fiber (graphite, basalt). Rubber is sometimes used for the twist locks and feet. Steel is often use to connect the tripod legs to the top of the tripod. Below is a brief description of the materials used in making tripods and their benefits.
Plastic - is the lightest weight material you can get for a tripod. In most cases plastic tripods will support a small camera and lens adequately. I use one called an Ultrapod that cost me about $20 and it is excellent for hikes into the mountains, business trips or any place size and weight is severely limited. Medium sized tripods that contain lots of plastic or plastic pan heads are fragile, unstable and disposable. I would only recommend the smaller pocket size tripods for occasional use.
Steel – is a metal alloy whose major component is iron. I own 2 Gitzo tripods with steel legs, a Gtizo 410 and smaller mountaineer, both are rock solid and strong, but also heavy. Steel provides very little vibrational damping and transfers cold to your hands readily. You can prevent this by covering the metal legs with rubber or foam insulation as described below. I also use a heavy steel tripod to support my telescope.
Wood – is the best material for dampening vibrations. It is strong and supports heavy loads, but tends to be bulky, heavy and deforms with humidity. Wood is also easily scratched and dented and needs to be lacquered. Wooden tripods were once popular and a few manufacturers still make them (Berlebach wooden tripod legs) also see the web site on How to Make your own sturdy wood tripod. If cost is an issue and you have wood working skills you might consider making your own wooden tripod. Most early photographers in the Canadian Rockies used wooden tripods (e.g. Byron Harmon and NIcholas Morant).
Aluminium – is lightweight and strong. For years most of the tripods I used were aluminium and made by Manfrotto. Aluminium is lightweight, strong for its weight, inexpensive, but transmits vibrations readily. Aluminium also shrinks or expands with temperature and the shinny legs can ward off some animals. Aluminium tripods appear to be the most popular material used in tripod leg construction though I am seeing more photographers switching to carbon fiber.
Carbon fiber - or graphite fiber is material consisting mainly of small 5-10 micron (1\1000 of a mm) long fibers bonded together as crystals. Carbon fiber is difficult to work with and expensive to manufacture. It’s main advantages include high tensile strength, high temperature tolerance and low thermal expansion and its very lightweight. It has a very high strength to weight ratio, can be extremely rigid though can be brittle. It dampens vibrations more quickly then aluminium (see below) and is one of the best materials for the construction of tripod legs. My first carbon-fiber tripod from Gitzo used to coat my hands with black dust when I handled the legs with bare hands – they have fixed this feature on the newer models. Carbon fiber tripods are more expensive then aluminium tripods, but as more companies make carbon fiber products their cost has come down a little and its nice to see a wider variety of brand names using carbon.Carbon fiber is one of the lightest, strongest materials and it also one of the best materials to dampen vibrations.
The amplitude in these charts is a measure of the vibration caused by mirror slap during an exposure when a camera was on different tripods. At the top a carbon fiber tripod and the bottom on a aluminium tripod. The amplitude of the vibrations was measured in microns using a laser vibrometer ( see PDF ). Even though the carbon fiber tripod is lighter the vibrations are smaller and do not last as long. Figure used by permission (March 2005 by Charlie Kim and Markins © see original paper used to measure tripod and head vibration- PDF, Markins manufactures quality ballheads - see their web site www.markinsamerican.com for a list of their photography products.
A quick way to test how sturdy a tripod is before you buy one is to mount your camera and lens on a fully extended tripod, look through the viewfinder and then tap the legs lightly with your hand. If you see the camera and viewfinder bounce around a lot, try a different tripod or head. At home you can test your tripod, head and lens combination by photographing a test target, a wooden fence, or a newspaper taped to the wall. Take some shots and then zoom in on your LCD screen and see how sharp they are. You will see that faster shutter speeds result in sharper pictures, you can also experiment with your mirror lock up and using a cable release. These are simple tests you can do at home or backyard and with digital cameras there is no cost and you will learn the limitations of your equipment. You can download a free test target that you can print - its designed to test lens resolution, but does a fine job for testing sharpness or problems caused by vibration (Download test target from Cornell Univ. Here - PDF). You should also compare how sharp your pictures are when you hand hold your camera - you might be surprised by the results.
Free Lens Resolution Test Chart from Cornell University - downlod the PDF and print it, tape it to the wall and test your lens and tripod combination. Vary your cameras ISO setting and shutter speed to learn how they affect sharpness.
How sturdy is your tripodTesting how sturdy your tripod and lens combination is easy once you own the equipment. I use a test target or I simply tape an old newspaper to the wall. I take a series of shots at different shutter speeds with my lens at its widest aperture by varying the ISO speed. This type of test usually reveals a loss of sharpness between 1\15 and 1\2 second. The higher the shutter speed the sharper my pictures. However, it the image is not sharp at higher shutter speeds, your tripod or camera support may not be adequate to support your lens. In the field wind will can also cause or magnify camera vibrations. You can try adding weight to the top of the telephoto lens, rest your hand, or add a bean bag on top of the lens to see if this improves the sharpness of your images.
The shutter speed used to capture this lunar eclipse was 1 sec - in order to get a sharp photograph I found it was essential to increase the ISO speed to 800-1600 and I used the camera's mirror lock up and an electronic cable release.
Many new photographers on purchasing a telephoto lens often find that initially their images are not sharp, in most cases it is due to poor technique and \or an inadequate tripod or tripod head. If you suspect the tripod is the problem, try shooting with the tripod legs at their shortest height. If you suspect your tripod head is the culprit - try and rest your camera on a bean bag and take some shots to see if they are sharp. Also make sure you are not using a slow shutter speed around 1\15 sec - even with a tripod vibrations caused by mirror slap are often noticeable between 1\8 and 1\2 sec - try a faster ISO speed. Also try using your self timer to take the shot. Getting sharp pictures with large telephoto lenses requires good technique in addition to a good tripod and tripod head.
My favorite tripod gear

Above are some of my tripods, my favorite 1) includes a Gitzo GT3530LS Systematic Carbon Fiber tripod ($775) with a Really right stuff ballhead ($355) and Optech insulated leg covers, total cost over $1000. 2) Milano M1-CF4SQR tripod with Milano B-2 Ball head total cost about $400 3) I use an Ergo rest with Acratech ballhead for shooting from my car window, the acratech ballhead also works well on small tripods when I am kayaking or shooting in wet weather total cost about $350 4) Ultrapod plastic tripod with a small Linhoff head attached. The tripod is ideal for putting in my pocket, costs only $20 at Mountain equipment coop and the ballhead was under $50. The ballhead isn't required but offers more flexibility in pointing my camera. I also use this small tripod to support a sound recording device or small Hero Cam. 5) Manfrotto monopod with clips - I covered the top with black tape for handling in the cold and also to reduce reflections that might scare off animals. Cost of the monopod was under $100, Arca swiss style quick release cost $100. Gitzo offers carbon fiber monopods starting around $375 and up. I only use a monopod occasionally so the Manfrotto is fine for my needs as I prefer to use a tripod over a monopod when ever possible.

This foggy night time image was taken using a small pocket tripod by placing it on the ground and using my self timer to fire the shutter. Any tripod would work in this situation, but I needed one I could carry in my pocket on this trip.Tripod leg locks
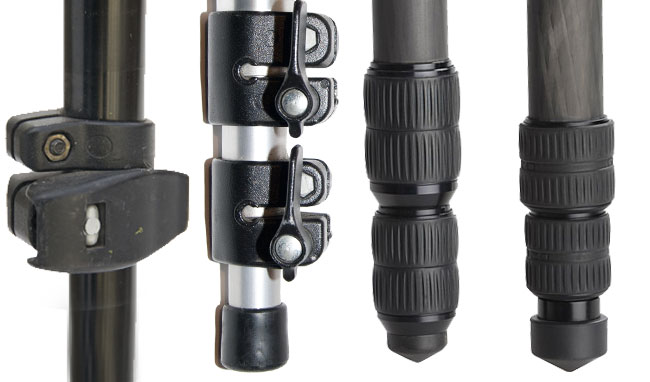
In general there are two types of tripod leg locks: twist type and clips. Different photographers have different preferences. Clips are faster, but I find they often need tightening and come loose especially when subjected to temperature extremes like shooting in winter. On the other hand the twist type can jam sometimes, especially after getting them wet. The older Gitzo carbon fiber tripods used leather bushings that would swell when wet and lock the legs. Newer Gitzo tripods use plastic bushings and so far they seem to work fine after getting them wet. The twist type locks are also more sensitive to sand and ocean salt. If you use your tripod legs in salt water you should rinse them with fresh water at the end of the day. Some twist locks require several turns to tighten, others only a half or quarter turn. I prefer twist locks because they are more secure and I have never had one slip. When you are in a camera store you can test a leg lock by simply extending the leg and then after locking it try to push the leg in. If you can push the leg in or pull it out when it's locked it either needs to be tightened or you need to look at different tripod.
Two types of flip locks and two types of twisting locks. Flip locks are faster, but often need to be tightened and are not as strong as the twist type locks. Test both types to see which ones you prefer.
Insulation for tripods legs
When tripods are used in the cold during early morning photography or during winter in cold climates, grasping onto the legs with bare hands is uncomfortable and drains the heat from your hands quickly. Metal tripod legs are especially good at absorbing your heat. A simple solution is to wear gloves, but gloves often make pushing small camera buttons more difficult so many of us simply remove our gloves. Another alternative is to purchase a tripod with foam rubber grips or buy some pipe insulation and black tape and attach them to your tripod legs. One company (Optech) sells the pipe insulation in packets of three with Cordura® leggings for around $30 in many camera stores. Pipe insulation is readily available at most hardware stores, I bought mine at Canadian Tire and a 3 foot tube costs about a dollar. The tubes come in different diameters. You want to purchase tubes that fit snuggly over your tripod legs so they don't hang loose. Black tape should be used to secure the insulation to the legs. A better solution is to use bicycle foam rubber if available and more tripod manufacturers are starting to include foam rubber on the legs of their outdoor tripods.
Pipe insulation from the hardware store can be attached to the tripod legs to reduce heat transfer and make the tripods more comfortable to carry over your shoulder. Insulation tubes are cheap ($1.00) and easy to attach.
This is my Gitzo 410 tripod with pipe insulation leg covers attached with black electrician tape - total cost about $5.00
Two companies that make and sell tripod leg covers are: 1) Optech USA and 2) LensCoat.com. The leg covers from Optech use the same pipe insulation material that you can buy from the hardware store, but they also provide 3 Cordura® stockings to cover and protect the insulation material - cost about $30. Lenscoat covers are made of closed cell foam padding and heavy-duty neoprene and use Velcro fasteners for easy assembly. The legs are available in black or camo style - costs start around $40. When you consider that some tripods cost $500 or more adding protective leg covers is a worthwhile investment and makes them more comfortable to carry and handle.
Tripod costs
Tripods can be had from $20 to over $1,000 - see links below. Slik makes some of the cheapest tripods and Gtizo some of the most expensive tripods for photographers. Tripods for shooting professional video can exceed thousands of dollars. The cost of the tripod depends on the materials it's made from, the size and brand name. Some brand names offer different quality tripods from beginner models up to the pro level. Some of the common brand names include Slik, Velbon, Manfrotto, Feisol, and Gitzo and their is growing number of specialized brands available only through specific stores like Milano from London Drugs, Oben from BH photo and Flash point tripods from Adorama in the US. I suspect many of these tripods are customized by one of the larger tripod companies. Vitec owns both Manfrotto and Gtizo and they also make cheaper clones in China and sell them under different brand names for less money. I have only owned a Milano for a few months, but from how it looks and feels it is comparable to a Gitzo, but only time will tell how it functions and holds up under use in the field. I would recommend looking at a Milano or other carbon fiber clone if you are in the market.
I would suggest if you are new photographer with limited equipment start out with lightweight or medium sized tripod. If you start out with a light weight tripod, it will still be useful in the future if you upgrade to larger model especially if you need something lightweight for traveling, hiking, kayaking, biking or anytime you need to keep weight to a minimum. The heavier sturdier tripods only become essential when you invest in large telepho-lenses (e.g. 300 mm F2.8) or bigger. So my advice is to start small and think big if you add a large telephoto lens.
How much should you pay? It depends on how much camera equipment you own, what is the biggest lens you need to support, how often you use a tripod, and how much weight you are willing to carry. At the low end you might spend between $30 to $150 to get a starter tripod and head. Midrange prices for an aluminium or even a carbon fiber tripods range between $200 to $400 e.g. the Milano carbon fiber from London drugs or a wide range of Manfrotto tripods. The high range usually includes tripods over $500 to about $1000 and that includes most carbon fiber tripods from Manfrotto, Feisol and the most expensive photographic tripods are from Gitzo. Sometimes you can get a good deal by purchasing a used tripod so long as you know what to look for.
Christopher positions my Gitzo 410 steel tripod with Arca Swiss Ball head to photograph a Calypso orchid. This is the biggest and heaviest tripod I own and for macro photography its overkill. What ever tripod you buy, the ability to flatten the legs down to the ground is essential for macrophotography. Trying to attach your camera to the bottom of the center post and shooting between the tripod legs just doesn't work in spite of what some advertisements suggest. I sometimes use a bean bag (blue) for shooting on the ground - its not as good as tripod but its easy to make (see my article on window mounts). A few tripods(e.g. Benbo) have a center tube that can be adjusted horizontally, and while some folks like this feature, I don't.
El-cheapo and gimmicky tripods
The tripods above are economical in price, small and lightweight. I stated near the beginning that I believe any tripod is better then none, but neither of these is a good choice for serious nature photographers. The legs on the tripod on the left can not spread out to allow photographing subjects near the ground, and the top is made of plastic . The quick release on these type of tripods is not very secure though the tripod will support a small lightweight camera. The Joby Gorrillapods do come in sturdier models but their small size makes them most suitable for small cameras where you might want to attach them to a fence, tree branch or other object.
Tripods optimized for video
Most photography tripods have single column legs, but if you notice many video tripods have double legs that slide out. The reason is that the double legs give the tripod more structural resistance to twisting and torsion which is vital when using heavy video cameras and pan tilt heads. Without this reinforcement every pan movement risks bringing unwanted juttering and shake into your shot. The wide legs, however also add bulk and weight that often isn't necessary for shooting with most DSLR cameras, but if you can carry a video tripod you will have a stable set up. You can also attach a video pan head to most photographic tripods.

Above are two carbon fiber tripods designed for shooting video. The two major differences between these and tripods for photography are the construction of the legs and the center leg supports. Pan and tilt heads also work well with large telephoto lenses and birding scopes. Tripods for outdoors often have spiked feet, whereas those for inside can have flat feet or wheels. Tripods designed for video can also be used for photography, however because some of them can't get low to the ground are not good for macrophotography. Professional video tripods also tend to be heavier then those used for photography and are usually more expensive due to their multi-leg construction. A tripod bag shown on the left is available for most tripods at camera stores and protects the tripods when travelling.
Maximizing the stability of your tripod with large lensesIf you have a lightweight tripod you can increase its stability by not extending the legs and sitting down on the ground and using the tripod in this position. It's not always a viable option, but when it is - it works. Other things you can do is to hang a weight from a bottom hook attached to a center column (as shown above) or from a base plate hook found on the bottom of some Gtizo tripods. When using long lenses you can also rest your hand on top of the lens to add a bit of weight, alternatively you can grasp the lens handle attached to the tripod and add some of your body weight as shown below by Dr. Wayne Lynch. If it is windy you can also remove the lens hood from a large telephoto lens provided the sun light isn't shining into the front lens element. Some photographers like to use a cable release or the self timer. I find this is helpful for macrophotography and astrophotography but not very practical for shooting wildlife. If your subject is not moving you can use your camera mirror lockup feature if available. It doesn't hurt to practice if you own a big lens either.
Dr. Wayne Lynch using a Gitzo Carbon fiber tripod a really right stuff ball head, Nikon 600 mm F4 lens attached to Nikon D300 camera. This tripod outfit is reasonably lightweight and can still support this big lens. However, never leave a big lens attached to a tripod unattended as it could fall or be blown over. By holding onto the lens attachment and camera Wayne is also adding some of his body weight to the stability of the tripod. For consistently sharp images with a large lens like this a sturdy tripod is essential along with a heavy duty ball head. Good technique is also important in order to get consistently sharp wildlife phtotos (see Dr. Wayne Lynch's web site to view his wlidlife photos).
When you need extra stability - sit down, shorten the tripod legs and your tripod will be more rigid. This works for example in the photo above where the photographer (Judy) is resting on an Esker over looking the tundra.
How not to attach your lens and camera to your tripod. In this photo the photographer has attached the camera to the quick release plate on the bottom of the camera body. If a lens has a tripod collar its best to attach the quick release plate to the collar for better balance and performance. Also avoid elevating the center post as this will significantly reduce the overall stability (Manfrotto Carbon fiber tripod and ballhead, Canon 7D with Canon 100-400 mm lens).
Using a lens collar offers better balance and performance on a tripodIf you are shooting with a telephoto lens or some macro lenses (e.g. Canon MP-E 65mm 1-5x Macro) and it has a lens collar - use it. It will not only provide better balance, but also allows you to rotate your camera into the vertical position. With both macro and large telephoto lenses try to use long quick release plates so you can adjust the position of the lens forward or back for better balance. The quick release plate on the 300 mm F2.8 below is too small - a longer plate would be better and provide more stability.
Telephoto lenses equipped with tripod collars and quick release plates. Some telephoto lenses work better on a tripod with VR ON others with it OFF - so test your lens, tripod and monopod combination to know for sure.
Some telephoto lenses work better with VR ON and others OFF when placed on a tripodNote that some telephoto lenses have better performance on a tripod with image stabilization turned OFF because the lens continues to drift up or down on the tripod in the absence of movement (e.g. Nikon 80-400 mm lens and my Canon 300 mm F4), other lenses like my Nikon 300 mm F2.8 seems to work fine on a tripod with image stabilization on – the bottom line is read your lens manual and then carry out some tests in your backyard mounting your large lens on a tripod and turning image stabilization ON and OFF and comparing the results. That's the only way to be sure.
Nikon 70-200 mm F2.8 lens showing focus limiter and VR (vibration reduction) mode button.
The Monopod Option
Fast moving subjects such as birds, athletes, mortocycles etc require the ability to move your lens quickly on a support and for this type of shooting many photographers prefer to use a monopod. Monopods start under $100 and go up in price to several hundred depending on the brand and materials they are made of. They can also be used as walking sticks and a few even have feet that splay out to form a tripod like support, but don't expect them to be very steady. Some monopods come with a quick release or head that rotates up and down. In my experience monopods can be used down to shutter speeds of about 1\15 of a second. They don't replace tripods because they are not suitable for landscapes or low light photography. I use mine mostly for photographing birds, sports and shooting HD video.
Jack Lueng uses a Gitzo Carbon fiber monopod with quick release and rotating head to support his Nikon DSLR and 500 mm F4 lens to photograph wildlife. Resting his hand on the lens also helps stabilize it and reduce vibrations from mirror slap. He has covered the lens with neoprene camo from lenscoat.com so it blends into the background and protect the lens from minor bumps and scratches.
Monopods from left to right: 1) Bamboo 2) ProMaster 3-8) Manfrotto monopods 9) Gitzo carbon fiber monopod. See links below for pricing and more information.
TRIPOD HEADSThe proper tripod head is just as important as the tripod and can cost as much or more then the tripod , so choose carefully. A three way pan tilt head is a good choice if you like a slow deliberate approach to photography such as when taking landscapes or macrophotography shots. Photographers using a larger format camera often prefer them as well. Some pan-tilt designs have short handles and knobs while others have longer handles.
Three way pan tilt heads
Three way pan tilt heads come in a variety of shapes and sizes. They are called three way pan tilt heads because one knob or lever allows you to pan the tripod head horizontally, another knob allows you to pan the camera up and down and the third knob allows the camera to tilt in the vertical orientation. Because they offer three separate movements they are not ideal for wildlife photography or fast moving subjects. These heads, however are excellent for use with large and medium format cameras, macrophotography and landscape photography where quick movement isn't required. You will notice in the photo below that some models have short handles and others long handles. The long handles act as levers and are good for manoeuvring heavy camera gear such as a 4 x 5 or 8 x 10 camera, whereas the smaller handles are better suited for backpacking with your tripod. The longer handle models can also be used for shooting video with your DSLR. I have used three of the models shown below and they all functioned smoothly. I no longer use pan tilt heads I simply prefer using a ballhead because they are faster and easier to setup. Also note that the quick release plates on the heads below do not slide back and forth which I find useful in order to better balance my large telephoto lenses. In the end, however it comes down to personal choice.
Above is a selection of three way pan tilt heads produced by Manfrotto. They allow careful movement in 3 axis and those with longer handles are also suitable for shooting HD video with your digital Camera.
Ballheads
I prefer to use a ballhead with an arca quick release plate on my camera gear. I can use long quick release plates on my telephoto lenses which I can slide back and forth to balance my camera and lens on the ball head. Ball heads also allow me to set the tension so I can pan with my large lenses and follow the action. They also have less wind resistance then a three way pan tilt head, they tend to be more compact so I don't have any knobs sticking into my back when carrying the tripod. The main advantage of using a ballhead is that they are quick to set up - load, tilt and lock. Their main disadvanteges include higher price, some of them lock up when wet or the balls don't rotate smoothly after time. It is possible to have them serviced, but I have owned 3 Arca Swiss Ballheads costing more then $600 each, and they all locked up and seized once they got wet. I have tried many brands and so far the best ballhead I have used is from Really right stuff and it turns out that most of my friends have switched to this brand as well. The only downside is that you must order the ballheads directly from their web site, but their service is excellent. The size of he ball head you need depends on how much weight you need to support, my advice is to lean toward a bigger ball head that way you can grow with it and use it to support larger lenses in the future.
Shown above are some popular ball heads 1 ) Really right stuff (RRS) 2) Markins 3) Kirk Enterprises 4) Feisol 5) Arca Swiss and 6) Acratech. All of these are fitted with Arca swiss type quick release slots and screw knob clamps. Since I purchased a RRS ballhead 2 years ago it's my day-to-day ball head and its the best I have used so far. It functions fine when wet and I have not experienced any problems in the field even at -30 C. I also own an Arcatech head (6) which works well in rain, sand and salt water and the open ball is easy to clean. The Acratech ballhead I own is only suitable for use with lenses up to 300 mm F4. The Acratech ball head does not pan as smoothly as the RRS ballhead but it does work nicely in extreme environments. I have recently been introduced to the Markins Ball head and it appears to be well made and I am told by the company that it functions when wet though I should drain it afterwards. The photographer who I borrowed it from would not permit me to wet it. As for the Milano ballhead shown near the top of the page that came with my Milano tripod, I have only used if for few months so its too early for me to know how durable it is. I am not suggesting you pour water over you ballheads, but if you shoot in the rain and cold and get condensation on the ballhead you will probably want some assurance that your ballhead will continue to function smoothly afterwards.
Avoid Arca Swiss B-1 Ballheads for use in outdoor field photography if there is a chance of getting them wet. I owned three of these $600 ballheads, they all functioned beautifully for a few months, then started to seize up after they got wet from rain, condensation or immersion in water. I sent two of the balls in for repairs and they still did not function smoothly afterwards. I got rid of 2 of them but still have one, but it's frustrating to use. Sometimes the Arca swiss knob locks up and I can't unlock the ball. I read that other photographers have experienced similar problems and that Arca Swiss has fixed the problem in their new Z-1 Ballheads. I also noticed that their prices have dropped from $600 to $400 in order to stay competitive. It does say in their instructions to make sure that sand and dust do not enter the housing and do not use any lubricants. With so many other ballheads to choose from today, frankly I would recommend you look at one of those other models before considering an Arca Swiss ballhead.
Manfrotto ballheads (see below) tend to be smaller and more economical than those shown above, but I have always found them to be prone to vibrations, don't pan smoothly and mostly suitable for smaller cameras and lenses. They are economical and readily available in camera stores.
From the standpoint of popularity most of my friends that are pro wildlife photographers or serious amateurs are using the Really right stuff ball head (see below). The cost of a good ballhead will run between $250 to $600, not cheap, but they are just as important as the tripod, perhaps more so. The ease and speed at which anyone can set up a ballhead make them a popular choice for most nature photographers. Do your homework before you invest in one - also see the links below to read other photographers opinions.
Screw knob clamps or lever-release clamps
Shown above 1) Manfrotto ball head with proprietary lever release clamp 2) Really right stuff with screw knob clamp and 3) Markins ball head with lever style clamp and safety pin. Some ballheads offer you the choice or a screw knob ball clamp or quick release type clamp. If the top of your Arca Swiss style clamp has a safety pin then you need to open the clamps wide enough to top load and in this case the quick release style clamp is faster. Quick release clamps also have a lower profile. A friend however mentioned his quick release pin fell out and he had to send the ballhead back to the shop for repair though I don't know how often this occurs. With my Arca Swiss ballhead, I had the knob fall off and a replacement cost me $50. Regardless of what type of tripod head you buy, when ever you carry your camera and lens attached to your tripod, always keep one hand on your camera strap! If the camera should fall you may be able to catch it before it hits the ground.
Joystick and GripBall heads
Joystick and Gripball heads are speciality heads that allow users to quickly reposition their cameras. They are essentially ball heads with handles. They are novel and fun to use, but should only be used with lightweight camera gear as they are not particularly stable and are prone to vibrations as they are attached by a rather small ball. If you position your gear way off to the side of your tripod - it could fall down. I have met several folks that love them, but I would recommend a more solid ballhead in their place for greater stability and ability to support a wider range of lenses.
Left Gripballhead and on the right a Joystick ball head, both from Manfrotto. These heads permit rapid positioning of the camera and lens, but are not suitable for large telephoto lenses or heavy gear.
Heads for shooting panoramas
Specialized heads are available for photographing panoramas and if you plan on making a lot of them then investing in one is worthwhile, however for most photographers I would recommend an L bracket that allows you to position your camera in the vertical orientation and use a ballhead with pan markings to ensure your pictures overlap by about 30% (if you are interested in how to do this read my article on shooting panoramas).
L bracket from Really Right stuff allows you to position your camera vertically and attach it to a ballhead with an Arca Swiss plate whereby you rotate the ballhead and take a series of overlapping pictures which you can stitch together in Photoshop. Cost is about $140 compared to the price of panoramic heads which can cost several hundred to over a thousand dollars. Really Right Stuff makes L brackets for specific camera models - see their web site for more information. I use one on my Nikon D300 camera so I always have the option of using my ball head to create pro-quality panoramas.
Quick release plates
Quick release plates are usually made of metal and screw into the bottom of your camera or lens mount and come in a variety of styles and shapes. Some of them can only be used with certain ball heads (avoid these if possible) while others like the Arca Swiss style will fit into any Arca Swiss style clamp. The main advantage is that the plates permit you to quickly and securely attach any camera or lens with a lens collar to your tripod head. If you ever need to set up and shoot quickly you will appreciate these quick release plates. On some of the cheaper ball heads or tripods that use proprietary quick release plates I have had them pop off. With Arca style quick release plates I have had a camera fall of my tripod when I forgot to tighten the quick release head ( 2X in 40 years), newer models with safety pins or posts prevent this but also require that you fully open the quick release clamp and top load your camera.
Above is a Markins ballhead with an Arca Swiss style clamp and safety pin to help prevent the plate from sliding off if you forget to tighten it. Several different sized arca swiss style metal plates are shown, a hex wrench for attaching the plates to the camera or lens mount and an Arca Swiss style clamp that can be attached to any tripod screw mount (about $100). Longer plates are used with large heavy lenses and permit you to slide the lens back and forth to achieve better balance. Some plates are modified to fit specific cameras (see RRS L plate above this photo). Most have a metal lip so they fit more securely onto the camera.. I have an arca swiss plate attached to each of my cameras and all of my telephoto lenses with lens mounts. The plates cost between $40 and $200. I own more then a dozen and find them essential but I do find cost their cost to be exorbitant. It also a good idea to keep one of the L shaped hex wrenches in your camera bag in case a quick release plate becomes loose. One interesting experience I had with quick release plate is that while shooting one cold winter day my breath condensed on the metal plate and it froze in the quick release holder I couldn't remove it until it defrosted.
Wimberley and side kick heads
Above is a Wimberley head attached to a Gitzo 410 tripod and supporting a Nikon 300 mm F2.8 lens with 1.5X teleconverter and Nikon D300 attached. The Wimberley head cost about $600. Wimberley heads are designed for use with large heavy telephoto lenses and are useful for maneuvering big lenses quickly to photograph birds in flight or rapidly moving wildlife. This tripod and head is heavy and not suitable for taking on long walks, but the lens floats in the air when balanced properly. I would only consider purchasing this head if you have a 300 mm F2.8, 400 mm F2.8, 500 mm F4, 600 mm F4 or bigger lens! I am still saving for a really big lens, and when I get one I am ready for it!
An alternative to the Wimberley head is a sidekick. The arm attaches to a ballhead and allows the user to support a hefty lens and move it quickly. The side kick is cheaper, smaller and portable but offers many of the benefits of the full Wimberley head. Which one to buy depends on how often you use a big lens and how portable you want your tripod to be.
Wimberley Side kick slides into the Arca Swiss plate on a ballhead in this case a Really Right Stuff ball head. You attach the lens via the lens collar and a quick release plate. The main advantage is that you can continue to use your ball head, but have the option of swinging your large lens to follow wildlife. The photos above are courtesy of David Lilly (visit David Lilly's web site).
Manfrotto pan head for shooting video also works nicely with large telephoto lenses and since I have a lens collar I can also rotate the lens into the vertical position. You can't maneuver the lens as quickly as you could with a Wimberley head. Note the elastic bands on the handle, by pulling on the elastic bands you can make the head pan more smoothly when shooting HD video. There are more expensive and smoother panning fluid heads but their costs start over a $1000. This head cost me about $350.
How to Use a Rubber Band to pan smoothly - watch Youtube video
Getting the best results from your tripodIn general, bigger, heavier, more expensive tripods are better at reducing camera vibration then smaller light weight tripods. The design and materials the tripod is made from are also important. The size of tripod you require depends on how much weight you plan to put on top and how much you are willing to carry. If you have a large telephoto lens and\or a heavy camera then a medium to large tripod will provide the best results. If you are using short focal length lenses (10- 200 mm) then you can get away with using a smaller lighter tripod. If you are backpacking, kayaking or hiking long distances weight becomes really important and I would opt for a small to medium sized carbon fiber tripod. No matter what tripod you use if you reduce the height of the tripod legs it will become more stable. If you use your camera's self timer and \or mirror lockup during exposure you can further reduce vibrations. I have found a cable release gives me the sharpest pictures when I am taking macro photographs with a tripod because often the shutter speeds fall in the range of 1\4 to 1\15 sec where the mirror slap induced vibration becomes noticeable. Other factors that make a difference with long telephoto lenses is that you can gently rest your hand on top of the lens or place a bean bag on the lens but only if the lens has a lens collar. Most big telephoto lenses have lens collars that attach to the tripod and allow the camera lens combo to be more balanced.
Conclusion
Tripods come in a variety of brands, sizes and materials, the best ones are made of carbon fiber and they are also the most expensive. Tripods not only steady your shots, but will help you compose more carefully and permit you to shoot in low light situations that you couldn't do otherwise. If you are serious about nature photography eventually you will need to buy one. Most folks buy a cheap tripod to start and are often frustrated using it and end up buying a better one later on. If you can buy a good tripod right off it will make you want to use it more often and your photography will reap the benefits. My recommendation is to consider a carbon fiber tripod with a ballhead that will work after it gets wet. If you are able to test a particular tripod before purchasing it that's the ideal situation. Some camera stores offer rental services and some even offer to put the rental fee towards the purchase. I hope the information presented here will help you determine what tripod and head might be best for you. I believe one shouldn't be thinking about their gear or camera settings when taking pictures, but instead focusing on seeing and how to best capture the subject. RB
Tripod Tips - Video by Really Right Stuff
How to Create a really smooth Pan using a Rubber Band - Youtube video
Tripods and heads used by some of my friends


Photographer |
|
Tripod and Ball head used & comments |
Halle Flygare - Pro |
Gitzo Carbon fiber tripod with Really right stuff ballhead to support a Nikon 200-400 mm lens. I need a sturdy light weight tripod for travel. |
|
David Lilly - Pro |
Carbon fibre Manfrotto Tripod 055CX pro4, I like the clip style locks on the legs and the tripod supports my Nikon 500mm lens mounted on the Really Right Stuff with the Wimberley Sidekick. The tripod is quick to set up and take down. I removed the rubber caps on the bottom of the tripod and attached spikes for the use in winter, because the rubber feet slide on ice, |
|
Peter Dettling - Pro |
Gitzo carbon fiber tripod and Really right stuff ballhead and also uses the Wimberley sidekick for supporting a Canon 500 mm F4 lens. |
|
Kamal Varma - Amateur |
Gtizto carbon fiber tripod and a Markins Ball head - the largest lens I need to support is a Canon 75-350 mm lens. |
|
Ian Neilson - amateur |
Feisol carbon fiber tripod and ballhead |
|
Karl Berdan - amateur |
Carbon fiber Velbon Sherpa Pro CF-530 with Manfrotto ballhead,it is lightweight and supports my Nikon D300 and 70-200 mm F2.8 lens. . |
|
Dr. Wayne Lynch - Pro |
|
Gitzo Carbon fiber tripod with really right ballhead to support a 600 mm F4 lens. |