
Adobe Photoshop Creative Cloud - First Impressions
by Dr. Robert Berdan
March 5, 2014
Adobe Photoshop Cloud version with the Adobe Exchange palette and background paper textures. For the most part the dark interface is the same as that in Photoshop CS6. In Adobe Bridge however Adobe removed the ability to create PDF slide shows and web galleries. These new features have been transferred to Adobe Lightroom 5.
As a professional nature photographer I am a fan of Adobe Photoshop and have been using and teaching this software program for over 20 years. Photoshop gives me a second chance to work with my images and because I shoot RAW files for their higher quality and flexibility, post processing of my images is essential. I realize that many photographers find Photoshop intimidating because of the many features and its complexity, however all one has to do is to take a course, workshop or buy a book and follow the tutorials to begin working with this powerful program if you care about how good your images look. There are probably more tutorials about Photoshop than any other software. I appreciate that most photographers, myself included, would rather be outside taking pictures then sitting in front of a computer processing images, but in Canada our extended winters offer a perfect opportunity to revisit the pictures and see if we can pull out a few gems. In this article I would like to share with you some of the new features in Photoshop Cloud version which for the most part looks like Photoshop CS6 and anyone using any of the previous CS versions of Photoshop will feel at home.
New Creative Cloud (CC) Software by Adobe
Adobe Creative Suite includes the following software programs, though most photographers will probably only opt for the Photoshop & Lightroom package available for $9.95/month. For more information visit: Adobe's web site by clicking here. If you are using Photoshop you will also need to download Adobe bridge which is a program that helps you locate your multimedia and image files. Bridge is included as part of Photoshop CC.
Adobe no longer sells its software on DVDS, the only way to get the software is to purchase a subscription online. Adobe's Creative suite of software includes over a dozen different programs including: Photoshop, Lightroom, Illustrator, Flash, Dreamweaver, Premiere Pro and many new programs aimed at multimedia developers like myself. The cost to for the entire Creative suite is $49.95/month which gives the subscriber access to all of these programs and updates. The user can download the programs onto two computers, even two different operating systems like Mac and PC. However, you are only permitted to use the software on one computer at a time. The first time you start the software you will need to log into your account, there after your computer needs to be connected to the net about once every 30 days, or 90 days if you pay the yearly fee. Adobe realized that most photographers will not need or want many of these other programs so they also offer a special package for photographers that includes Adobe Photoshop CC, Lightroom 5 and Bridge for $9.95/month. In the past Adobe offered different versions of Photoshop, a regular version and an extended version that included 3D modeling, and other additional tools. Thankfully they have done away with that inane idea - now there is only one version of Photoshop and it includes all of its features.
Before you consider downloading and subscribing to Adobe Cloud (Cloud refers to free space you can store and share your processed images with others), make sure you have the latest computer operating system Windows 7 or 8. (Vista, and older versions are not supported). On the Mac you will need OS X or higher. Also 4 GB of RAM is the minimum, I find the software sluggish on a computer with 8 GB so if you need to upgrade your computer better do so before you subscribe.
To help you learn Photoshop and other cloud software, Adobe to their credit, has expanded their Adobe TV training videos and includes hundreds of step-by-step online videos for free – check out: http://tv.adobe.com/channels/ - you may have to do some searching for specific tutorials, but there are lots of good movie tutorials demonstrating the new software features. Also see the links at the bottom of this page.
New Photoshop CC Features
Some of the new features in Photoshop CC that will attract photographers attention are: shake reduction to reduce image blur, more intelligent up sampling that allows you to increase the size of images and no specified limit to how large you can up-size Camera RAW files, improved smart sharpen tool, addition of Adobe Exchange that allows you add additional plugins, some are free and some cost money. There is a new perspective warp tool that may benefit photographers that photograph architecture. Camera RAW features an O tool (radial gradient tool) for lightening or darkening parts of the photo within or outside an "0" selection. Other improvements are aimed at web designers including the ability to produce CSS from slices, better control over shapes with rounded corners, and enhanced 3D painting tools to mention just a few. Below are some of the new features that caught my attention.
1. Shake Reduction Filter
Usually when a new version of Adobe Photoshop comes out it, Adobe includes one or two new must have features. In Photoshop CS5 it was content aware fill, in CS6 content aware move and tilt shift lens features (see my previous article on Photoshop CS6) . In Photoshop creative cloud one of the new "big" features is “Shake Reduction”. I saw a demonstration of this filter 2 years ago on the web where Adobe demonstrated how they took a blurry image and made it sharp. I was quite excited about the possibility of being able to fix some of my blurry images (yes even pros take blurry images sometimes), unfortunately the reality is that shake reduction only seems to work on images that are slightly soft. Most of the blurred images I tested with this new feature were still unusable when I finished.
To access the shake reduction tool select Filter > Sharpen > Shake reduction to be presented with the box below
To see how this tool works watch this Adobe TV video: http://tv.adobe.com/watch/learn-photoshop-cc/using-the-camera-shake-reduction-filter/ The blurred image of the mink above was not recoverable not matter what settings I tried. The filter will not work with out of focus pictures, only images where there is some blurring due to camera movement.
I lowered my expectations and tried the filter on some images that were only moderately soft and there the filter does seem to be able to improve the image. The bottom line is don't get rid of your tripod and don't expect to fix really blurred images - at least not yet.
Swift Fox slightly soft due to camera movement
Swift fox after applying Shake Reduction filter
If the shake reduction filter only works with images that are slightly soft, I wondered how it compared to simply using the unsharp mask or Smart Sharpen filter. In comparison, the image on the right did appear sharper after shake reduction, but only slightly so. The bottom line is that the new shake reduction filter is a welcome addition, but it's only able to fix images with a small amount of blur - maybe Adobe will improve the shake reduction filter performance in the future.
Watch Adobe TV video on Shake Reduction by Clicking Here.
2. Camera RAW 8 Filter
In the previous version of Photoshop you could configure Photoshop CS6 to open .jpg and .tif files in Camera RAW by going to Edit > Pref >File Handling > Camera RAW preferences >JPG and TIF file handling. Now you can open a JPG file or TIF file and apply most of camera RAW features to a JPG file from within Photoshop. To do so select Filter > Camera Raw Filter then apply RAW settings such as exposure, white balance, gradient filter etc. The straighten filter, however is not available using the Camera RAW filter though it is when you open a RAW file directly for some strange reason. The Camera RAW filter makes it easier to apply additional controls to .jpg and .tif files and is a welcome addition. The new "O" or radial gradient filter allows users to resize a circular or elliptical selection and modify properties such as exposure inside the selected region. The camera raw filter can also target a single layer in a multi-layered design file.
Watch Adobe TV movie about new features in Camera RAW
3. Adobe Exchange
Exchange is a new feature that lets you download and install plugins into Photoshop that extend Photoshop's existing features. Some of the plug-ins are free, some you need to pay for. I downloaded a few to see how they work and so far I am liking what I find. After downloading you may have restart Photoshop for these plug-ins to show up under Window > Extensions > Adobe Exchange.
Above is a screen shot showing some of the extensions you can download. The extensions are rated as 1-5 stars by various users and you can select free or paid extensions from the top tab. My first extension I downloaded was Edge Effex free version which allows you to quickly add painterly like edges to your images by simply clicking on the filters. I opened a photo of an eagle and applied one of the Edge EFX quick filters as shown below.
In my previous review of Photoshop CS6 I wrote an article about Photoshop digital filters including Edge FX. There is a paid version of Edge FX that offers many more filter effects.
The most interesting free plugin I downloaded so far is Paper Textures Pro. This free utility provides you with a variety of paper backgrounds that you simply choose, then click on the paper type and it overlays the texture onto your photo like that shown above. You can add or purchase additional textures at the web site flypapertextures.com. I am so intrigued with this plugin that I plan to do a follow up article that will focus on this feature alone.
Watch video on Adobe Paper Textures Pro - Adobe TV Video
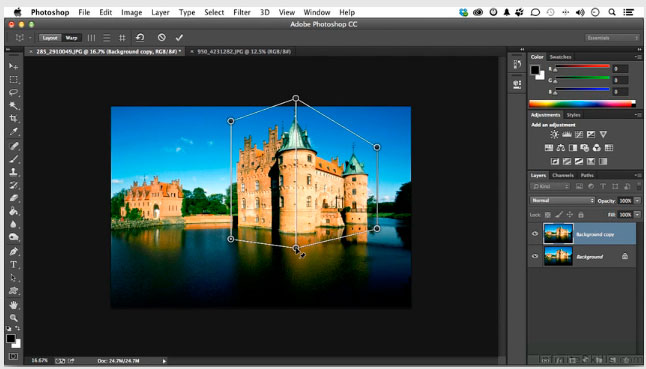
4. Perspective Warp
The new perspective warp feature is accessed by selecting Edit > Perspective Warp - you draw grid boxes and then adjust the box shape to alter the structure of the image. It's useful for changing the perspective on buildings and rotating them in 3D space.
1. Edit >Perspective Warp
2. Drag a grid around part of the building - usually you create 2 boxes or grids. Click on the Warp button at the top, then drag the corners of the rectangle or shift click to drag a vertical line. Note the other options at the top used to straighten and modify the perspective. To see a demonstration of this new tool watch the Adobe TV video to see how you might use this tool - link is below the picture or click on the picture.
Watch Adobe Video on Perspective Crop (screen shot above from the video).
5. Image Resizing in Adobe Photoshop
To access the image resize box you select Image > Image size as in previous versions. Using preserve details is supposed to provide the best results. What is different is the preview window is scalable and the algorithms used to up-size the image are better. Above I used a small 1.2 MB image and tried to up-size it to a 21 MB file and you can see in the preview window it still looks soft and fuzzy. The larger your initial image is the better the results and the more you can up-size, but there is a limit. In the past to make really big images I used a plug in called Genuine Fractals now called Picture Prefect Resize (web site: http://www.ononesoftware.com/products/resize8/).
In previous versions of Photoshop, Genuine Fractals was better at up-sizing the files and most reviews came to the same conclusion (e.g. OnOne Perfect Resize 7.5 Software Review by Ken Kaminiseky). I suspect that Perfect resize may still be better because that's all it's designed to do. I searched for a recent side by side comparisons but did not find one as of yet and the company that creates OnOne Pefect resize has not responded to my email asking how their software compares to Photoshop CC. Personally I would like to see Adobe acquire and integrate Perfect resize software and all of its features into Photoshop in the future.
Watch Adobe TV video on Image Resizing
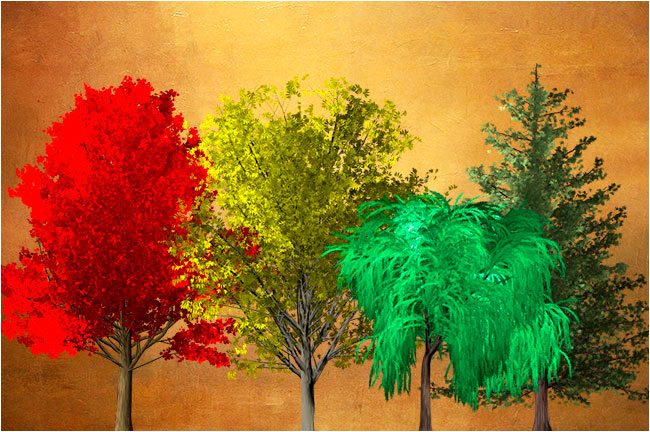
6. Scripted Patterns and Fills
Scripted Trees that you can add and modify to your photographs
Edit > Fill > Patterns > Scripted patterns > Select options > tree > choose Tree Type (Trees are new in Photoshop CC). You can choose from a variety of trees, modify their properties and change the colour of the leaves and add the trees to your images.
There are a wide variety of trees that can be customized including their shape, number of branches, leaves and their color. If you are working on a Photoshop painting or just want to add a tree to an otherwise open scene you can now do this easily. Below I just added a few trees to a paper background. By using the edit-free transform tool (Ctrl-T) you can resize the trees and move them to where ever you want them in your photos. There are 22 different types of trees included and each one can be modified and saved as a preset.
Above I added four types of trees, and changed the color of their leaves. To resize the trees use the Ctrl-T command.
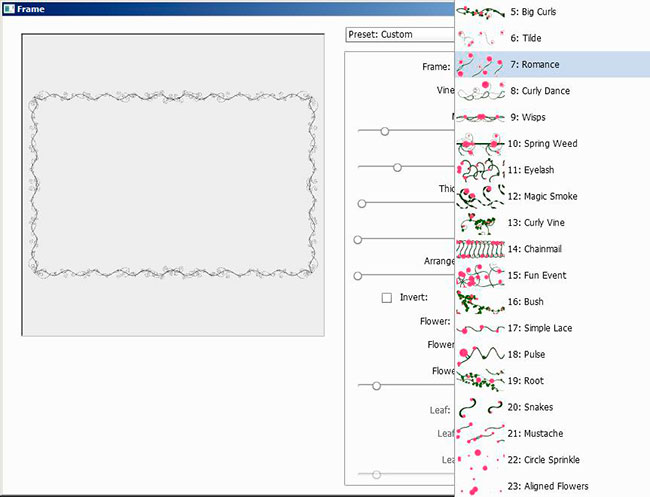
In addition to scripting trees you can also add a wide variety of "fancy borders", however after trying some of them I can't say I will be using any of them with my photos. It would be nice to see some filters to add wood frames and matted paper to an image to simulate what they might look like in a gallery.
Some of the many border styles you can add to your pictures. These might be useful for post cards and wedding invitations, but they all look hooky to me - see below.
Hooky frame I added to a Black and white photo, but hey maybe some of you out there like this kind of thing.
Watch Adobe Video on Scripted Patterns and Fills
Adobe CC Conclusion
Renting software seems to be the new paradigm used by Adobe and will probably be adopted by other companies in the future. There is no middleman, the software is delivered electronically, they get better control over pirated software and they generate ongoing revenue. The main advantage to the customer is updates and bugs are fixed more frequently. What this will do for software pricing is anyone's guess, but my hope is that the costs will come down in the future. The $9.95 month is reasonable for Photoshop and Lightroom, but $49 for the entire suite is on the high side in my estimation given that only a few people will actually make use of all of their programs. Because I own the previous Creative suite, I have the first year of the cloud for $29.95 and that to me seems like a fair price. I won't be getting rid of my older versions of Photoshop however because I like to use the extract filter in CS5 and the ability to create PDF files quickly and easily in earlier versions of Photoshop. For those that think Photoshop is too complicated, my advice is to take a short course to get up to speed - you don't have to know everything to make use of this amazing tool. After 20 years of using Photoshop I still learn new things about this program every week and I use it daily. With this new version it will take me several months to catch up and learn most of the new features. If how your photographs look is important to you, there is no other software tool that can give you as much control over the image as Photoshop. Although I have not discussed Lightroom which is included with Photoshop, this tool is useful in my opinion for creating e-books and slide shows and some find it easier and faster to learn. For cataloguing my images I will continue to use Google's Free software program Picassa, but I can see integrating Lightroom into my future work flow. RB
SUMMARY


My Likes about Adobe Photoshop CC
- Can download and install software on two computers including one Mac and one PC version
- With the Creative Suite Adobe makes all of their software available for one price
- One no longer needs to purchase updates or fixes they are included with your monthly fee
- I like the ability to download additional plug-ins via Adobe Exchange especially the free ones
- Lightroom now includes ability to create Photo-books and export as a PDF which can include sound & video
- Photoshop's up-size feature is improved
- Adobe Photoshop has improved drawing tools and CSS support for web development
- Adobe TV videos are very helpful in learning about new techniques and are available for free
- Adobe Classroom in a book series offers excellent tutorials for learning the software (Adobe press and Peachpit)
- The ability to easily apply a Camera RAW filter to .jpg and .TIF files is useful
My Dislikes about the Cloud
- Cloud does not support older operating systems like Vista 64 - upgrading the operating system is a real hassle
- I don't like having to log in with username and password frequently when using the software
- I don't like the fact they moved Adobe PDF builder and web galleries from Photoshop CS6 to Lightroom 5
- I am not thrilled about having to pay $49/month to use the software for the rest of my life
- Adobe removed the extract filter in CS5, replacing it with the quick selection tool, but I often prefer the extract filter
- As a teacher I used to be able to get educational pricing on software, but I can't do this easily anymore
- Camera shake reduction tool is a disappointment as it only works on images with small amount of blur
Links to Additional Resources
- Adobe Photoshop Photography Program including Lightroom - Adobe's web site $9.95/month
- Digital Photography filters and Plugins for Adobe Photoshop by Robert Berdan
- Photoshop CS6 Beta - First Impression by Robert Berdan
- Photoshop's Cut Out Filter - Creating Photographics by Robert Berdan
- Creating Cyanotype Photographs with Adobe Photoshop by Robert Berdan
- Simulate "David Hockney" Style Photographs Using Photoshop by Robert Berdan
- Make New Photographs Look Old Using Adobe Photoshop by Robert Berdan
- Restoring Old Photos in Adobe Photoshop by Robert Berdan
- Creating Star Trail Photomontages in Adobe Photoshop CS6
- Time Lapse Photography - Tutorial and Techniques the Aurora Borealis (Northern Lights) by Robert Berdan
Video Adobe TV
- Photoshop CC Overview videos January 2014
- Creative Cloud for Photographers Videos - New Features
- Adobe Lightroom 5 - video tutorials
New Extensions and Utilities
- Flypaper textures pack - add different backgrounds to your images using the free Flypaper extension
- Type Rendering in Photoshop CC - video
- Painting 3D in Photoshop CC -video
- How to use Photoshop CC to automatically generate web graphics from layered files - generator - video
- Scripted patterns and fills - upgraded feature you can paint and add trees - video
- Russell Brown Show - Photoshop video tutorials
[ Top ]